So, apart from the bathroom (which was a complete state) the biggest single chunk of work to be done in my new place was the kitchen.
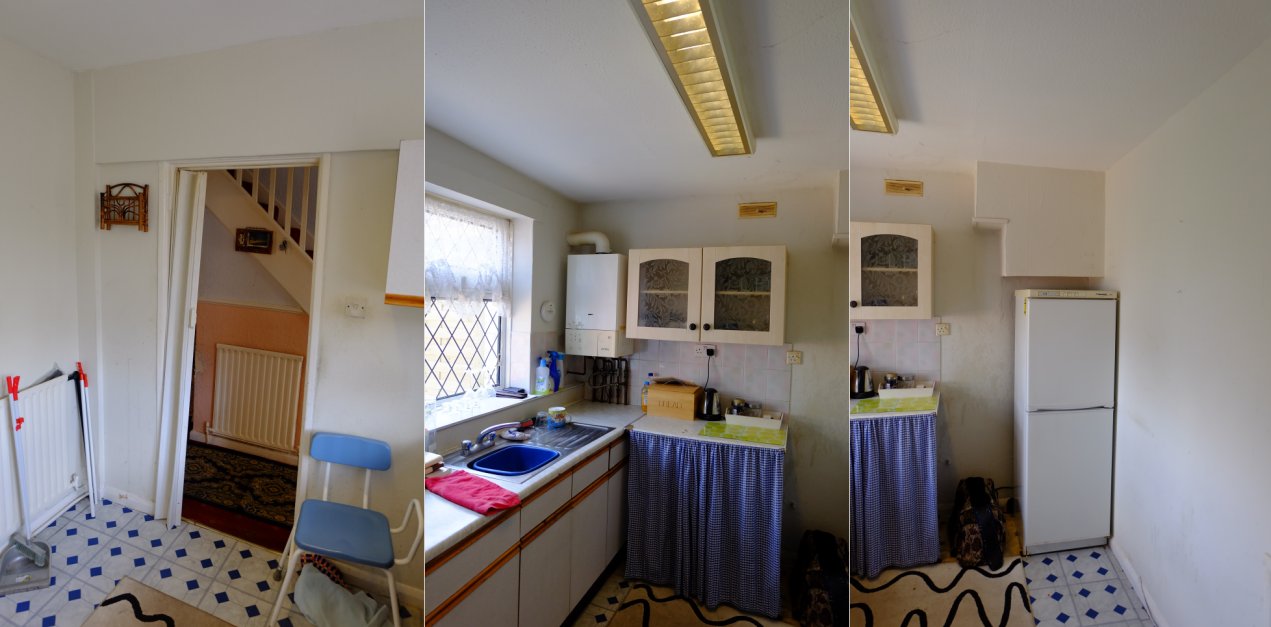
Basically, I didn’t really have one.
I mean, I had a sink, a manky fridge freezer, but no cooker (bought a little induction hob thing) but that was about it – you can see here after I just bought the place and it wasn’t too messy.
Finally this year I got around to organising the replacement works, after much procrastination.
The first step was to tear the old kitchen out, which was mainly done by Jo’s parents (which was very nice of them!) and here we can see it at it’s most ‘disassembled’, but with some chasing I’ve already put in for the new sockets – note that at this point we’d had the radiators in the house replaced, including changing the traditional radiator in the kitchen into a vertical one – mainly to make room along the inner wall for more worktops.
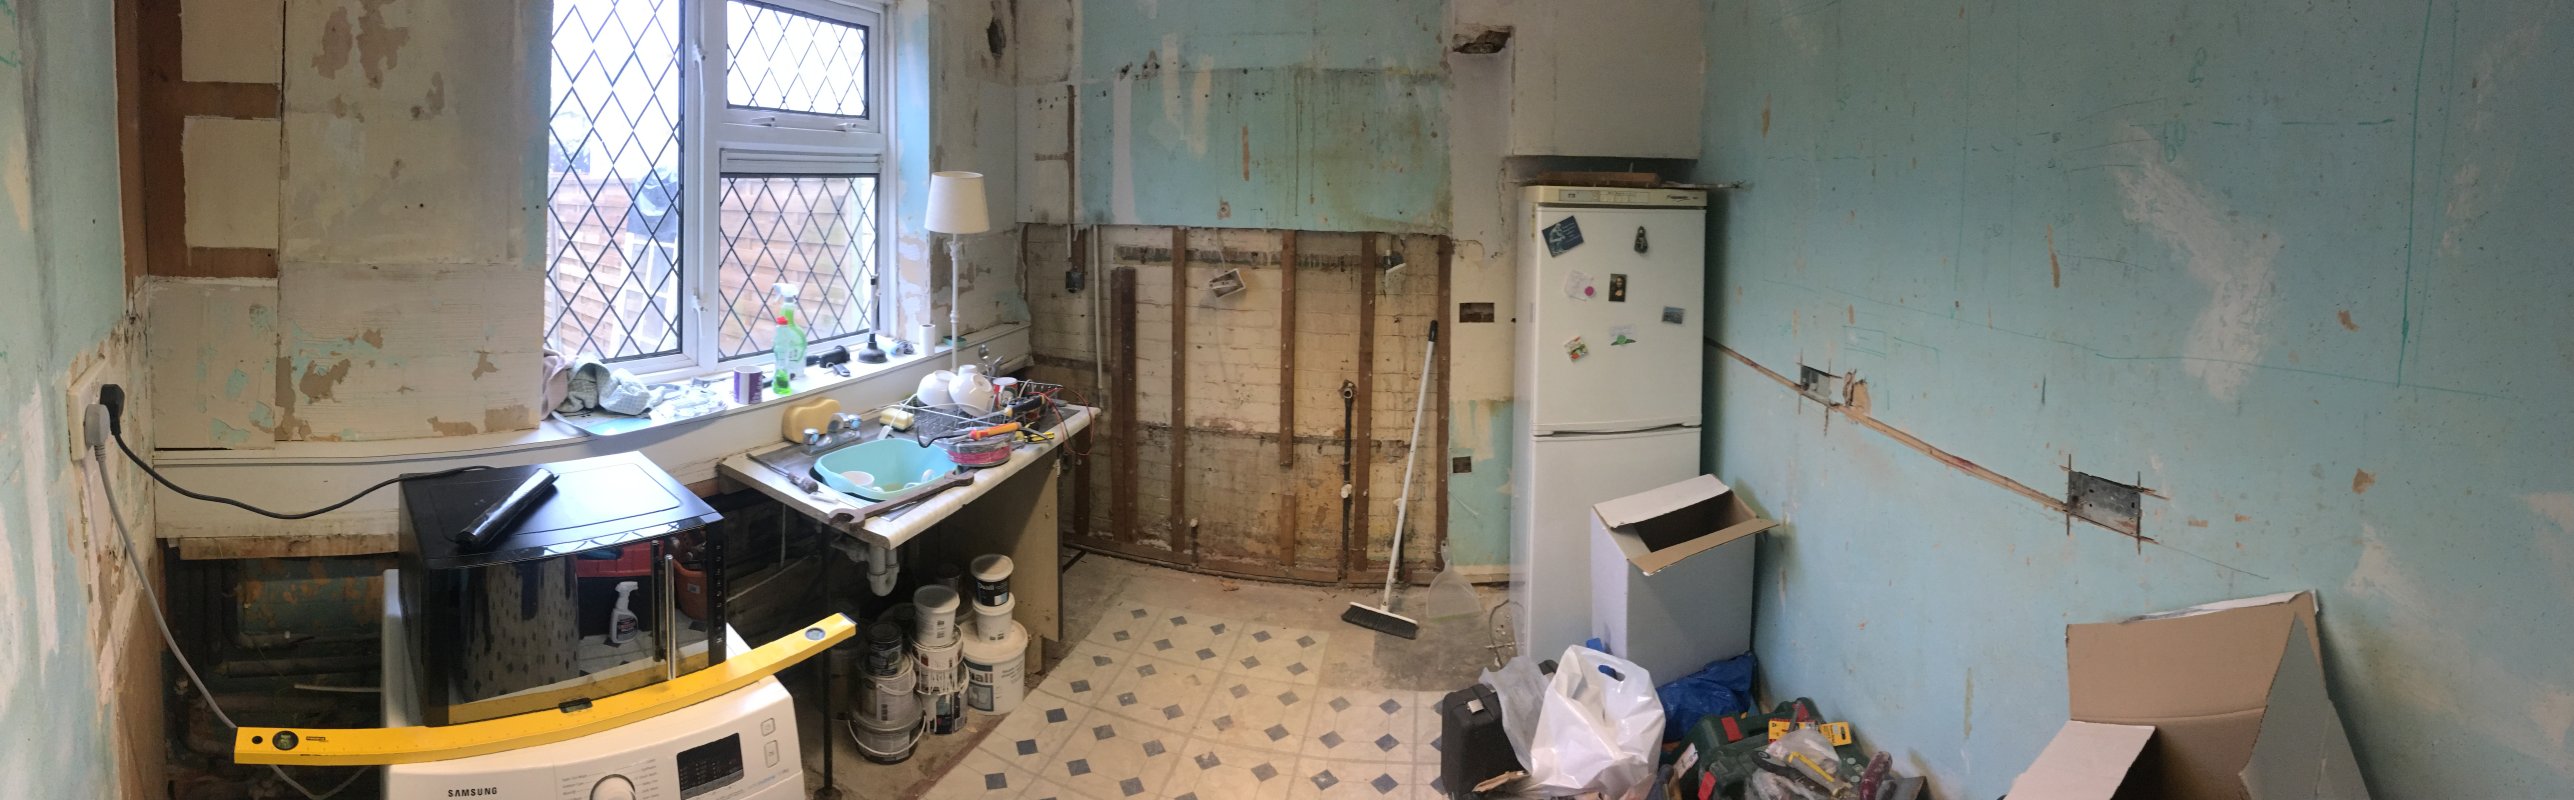
At this point, I had already booked in the plasterers to come in and skim the place (as well as the hallway ceiling as it was pretty ropey), so they were really good and took 2 days to do it all, with prep and working around some plumbers on day one. I really had to remove a bunch of old pipework and simplify it all – you can see the old gas feed lines on the back wall which I no longer needed.
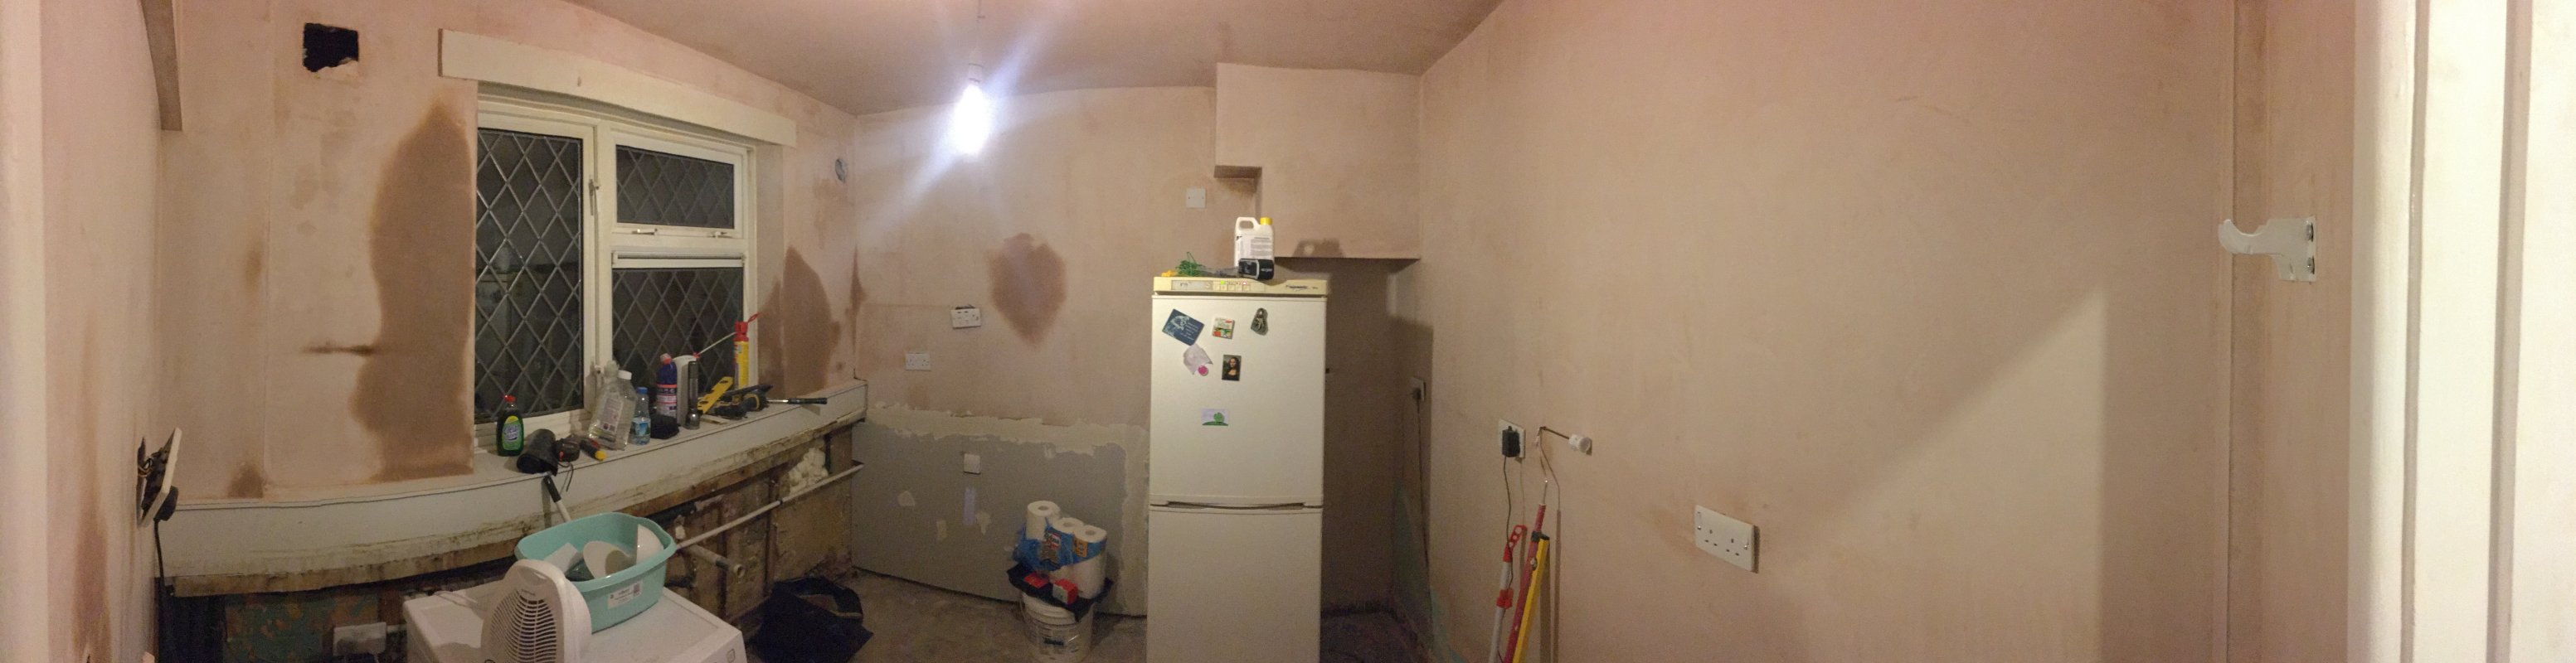
Here we are with the plastering nearly dry, I was itching to get painting, also all the sockets we in place at this point.
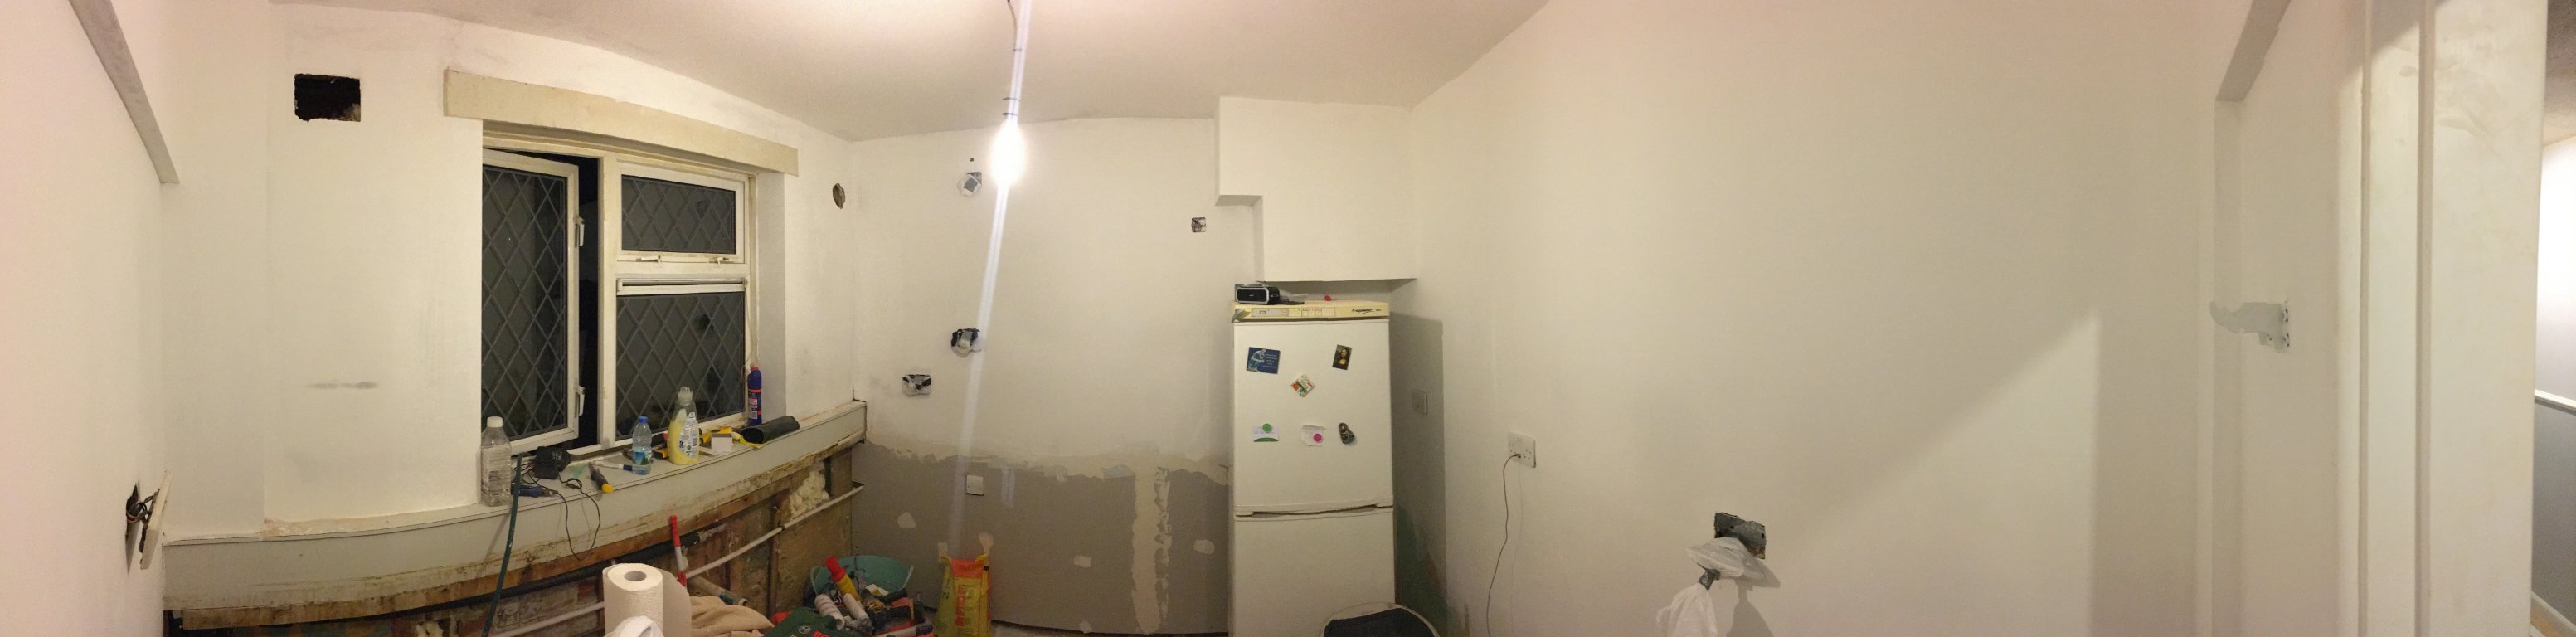
Whilst here, we see the bulk of the painting done – once again with sterling help from Jo’s parents.
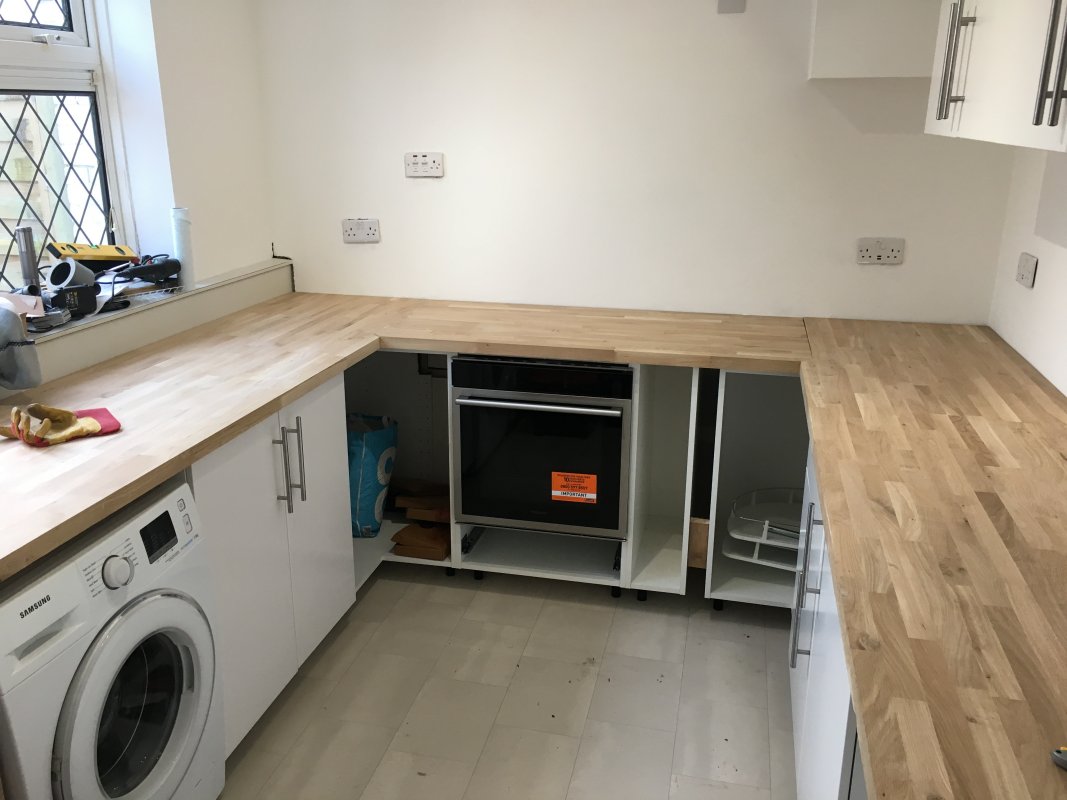
Once we’d hit this point, I realised that there was essentially a big dip in the corner (lower left in these pictures) of the floor, so I levelled that out with a concrete flooring mix, then the flooring was laid (thick vinyl/lino for simplicity) with Jo’s dads help (thanks Doug!). In the meantime, all the units from Ikea had been delivered, and we now got cracking putting them in, using a rather clever rail system which you hang the backs of the units onto. Here you can see the results of day 1.

It was at this point that I realised that I could fit another 20cm unit in the gap left next to the oven unit, which was handy as I was looking to get one of those narrow spice drawer thingies.
I’d ordered 40mm solid oak worktops from another supplier (they looked nicer and were a good deal – and very helpful! www.savoytimber.com) and these arrived and promptly took up half the hallway. With some help from my mate Ian, and his fancy festool track saw, we cut the worktops down to length and got them in place – here you can also see the oven in situ.
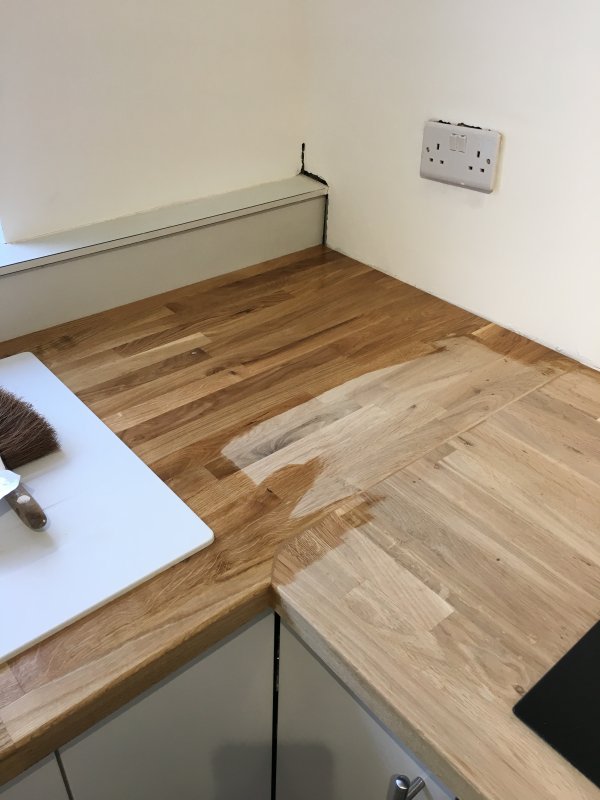
Obviously at this point, there are no holes cut for the hob or the sink, and the wood is just it’s natural colour and unstained.
After cutting the holes (btw, make sure you have some good jigsaw blades, some patience and strong arms to cut 40mm oak – hard stuff!) and faffing over getting custom coloured filler to fix the small gaps in the joints, it was time to stain and protect the wood. After research and recommendations, I decided to go for Osmo 4006 as the base coat, and then Osmo 3058 as the top oil (you can get both from various places). I was really very pleased with the final effect that the oil had, really brings out the grain – and very hydrophobic!

Next was to install the extractor fan – I’d planned the location of the hob with the extraction in mind such that I would reuse the already big hole in the wall that used to be the exhaust for the boiler (which was moved upstairs last winter when the old one died) – as such I had to build an enclosure for the extractor ducting, as well as putting a vent on the outside wall – you can see the enclosure here installed, filled but not painted.

Once it was painted, and the upper section of the hood pulled up, you’d never know it wasn’t always there – thankfully…
Although I was happy with the worktops, I decided that adding upstands against the wall would be a good idea, also they would offer a base point for the tiles to sit on top of, as such I ordered some solid oak upstands at 18mm x 80mm x 3m to go along the two walls, but not along the wall behind the sink.
Cut, fitted and oiled they don’t look too bad I thought.
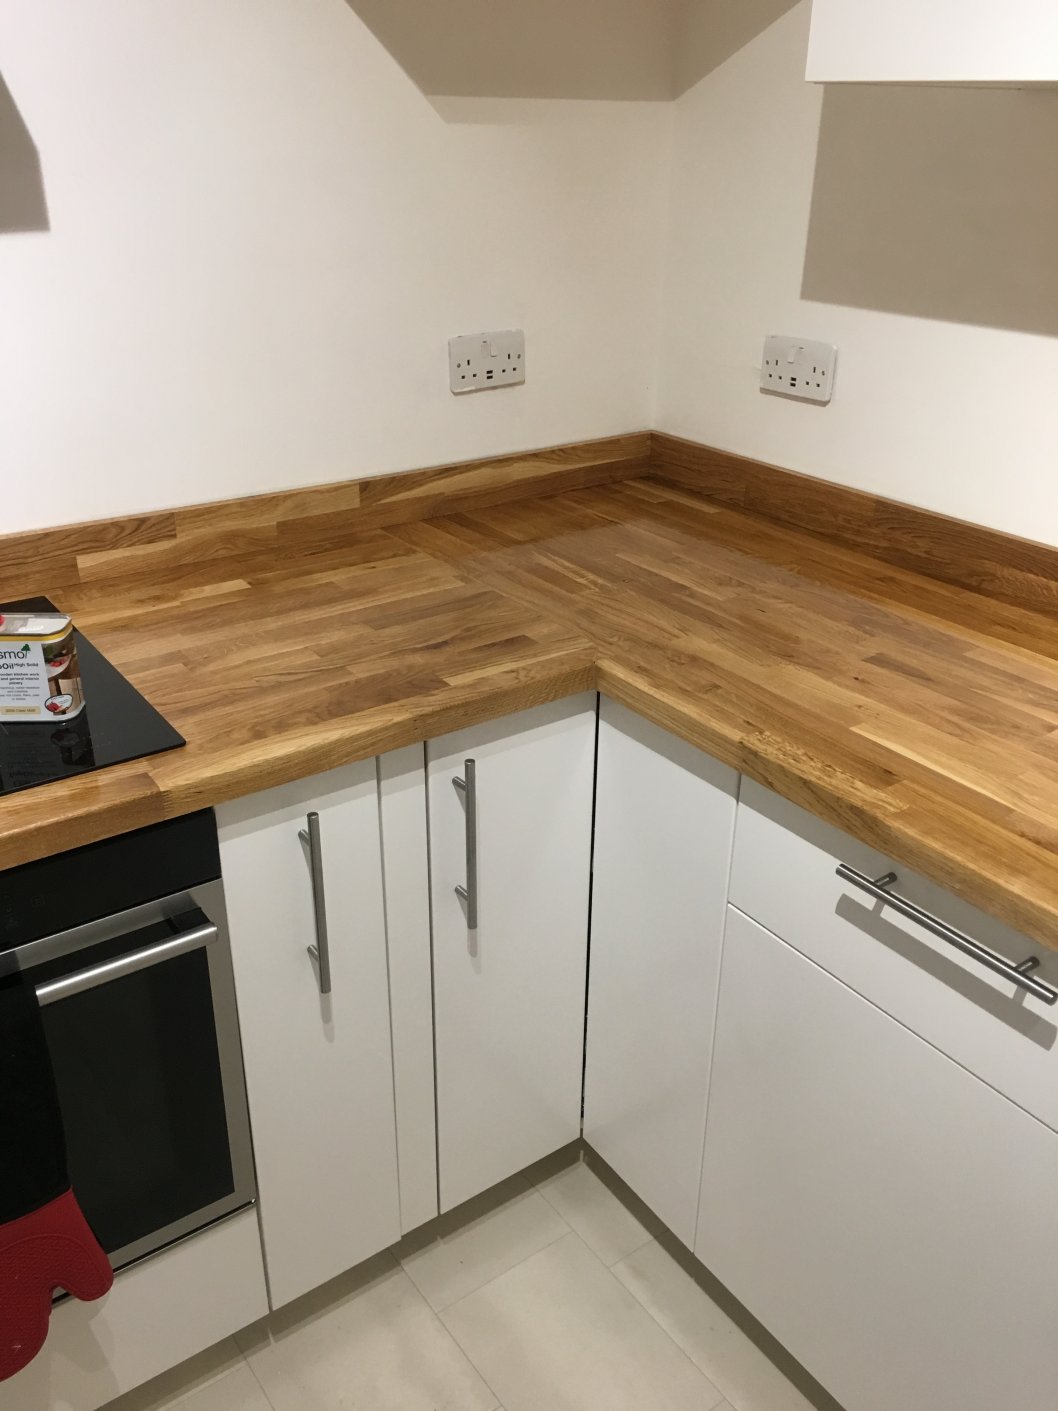
After this, the only item left to do really is the splashback for the hob and tiling, with the plan to go for simple white metro style tiles and a coloured ground in a kind of green to match the custom glass splashback, you can see the end result of this here.
<insert image>
All in all, quite good fun!
Be First to Comment